In my last post related to NimbleStorage it was more focused on the Company, and products they offer. However I did note that I would take a few moments to document the UI and how easy it is to manage. In this post I am going to go over the UI and the different features contained within it.
The UI is Adobe Flash based, you will need v9 or higher installed on your management system to view all aspects of the UI, it will still function without Adobe Flash installed, but you will be missing some of the charts. I have ran the interface from Chrome, IE, FireFox, and Safari without any issues.
Landing Page
Once you open up your browser of choice go to the management IP that you configured on your array. You will be presented with the following page.
Home
This is the Home Page, and will contain a dashboard related to all the information you will normally want to see from a quick health check.
Disk Space: Will show everything you need to know about your usage, as you can see it will show the Volume Usage, Snapshot Usage, and unused reserve. It is very simple to read, and makes for a great screen shot.
Space Savings: This is where you get to see your savings and how the Nimble is saving you some space. As you can see from below my space savings is 2.51 TB or 40.55%.
Throughput: From here you can see how much data is passing over your Array interfaces. This shows current usage and for the past Hour.
IOPS: Again from here you get to see your Current IOPS usage across all your LUNs, this also shows back for an hour.
Event Summary: All Events that have happened in the last 24 Hours
Recent Events: All recent events, last hour.
The interface is controlled from a tabbed driven menu, this is the the menu you will see from any page within the Nimble Management Interface. I will explain the rest of the Interface in order.
Manage
The Manage tab is where you can configure your Volumes, Replication, Snapshots, Protection and Performance Policies, Array, and Security.
Volumes
The Volume Menu, is where all the magic happens with the Volumes, you can do anything volume related within this Menu. The first page you will see will give you a full overview of all Volumes that reside on your array, with basic information related to the usage.
Click on a volume name, and now you have all information pertaining to that Volume. Here you will get the overview of your volume, you can edit, take a snapshot, set it to offline, Take ownership of the volume with “Claim” (Used if the Volume came from a replicated source) or Delete the Volume. You can also look at the Snapshot, and replication status for the Volume.
Protection
The Protection Tab offers three choices.
1. Volume Collections: This allows you to protect your Volumes with Snapshot schedules and replicate those snapshots off to a second Nimble Array.
2. Protection Templates: Predefined templates to help protect your critical applications. You can use these to as a baseline for creating your own custom Volume Collection Groups. Nimble was just nice enough to give us something to start with.
3. Replication Partners: A place where you can view your configured replication partners, or define new ones. I don’t have any configured but you would see them here, you can also setup Bandwidth Policies so you can replicate without having to worry about the bandwidth being affected during busy times within your environment.
Array
From here you can look at the status of your Hardware, and view all the system information related to your Array and Controllers. You can also edit the Array name, and Network Address information.
Performance Policies
Here is where you can setup Policies to configure your Volumes with certain parameters. These Policies give you the option to create volume with certain Block size, and if you want to cache, or compress the volume. We all know we have certain workloads or datasets that we don’t want to waste our precious cache on or they won’t benefit from compression.
Initiator Groups
This allows us to create groups of initiators that we can then assign to volumes to allow a host access to the volume.
Chap Accounts
From here we can create a Chap Account, that we can then assign to Volumes we create to gives us some control over what we allow to connect to our Volume.
Monitor
This is the place where you can see all the great performance you are getting out of your Nimble ![]()
Performance
You can view performance based off all Volumes, or a selected Volume. The time frame can also be for 5 Minutes, 24 Hours, 7 Days, or 30 Days. This will give you a very good picture of how your system is performing, it will also allow you to pin-point Volumes that are eating up the majority of your system.
Replication
The place you will want to head to find out how your replication are performing, and if you have any issues with them.
Connections
This section shows each Volume you have configured, and how many connections are connected to the Volume. From here you can make sure you have the proper amount of connections as you have configured from your host.
Events
This Menu shows all the events related to your array, it keeps a log for 30 days, and you have the ability to filter the results based off of severity, Category, and Time.
Administration
As the name depicts this has everything to do with Administration. I will explain the Menu items below. This is the only Menu that once you select one item, the other items will be listed on the left hand side of the window. This gives you quicker access to the other items.
Email Alerts
Here you can configure the system to send you email alerts. You can also tell it to send alerts back to Nimble support, which will create a support ticket.
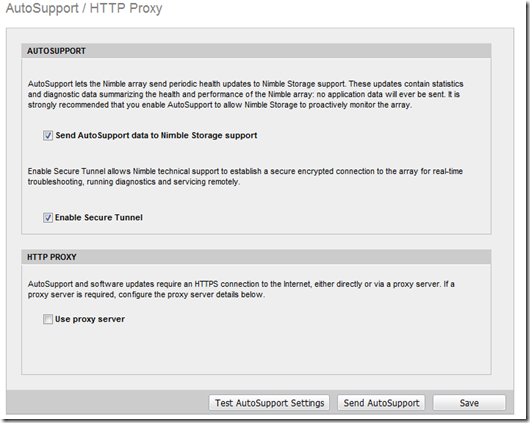
AutoSupport/HTTP Proxy
AutoSupport enables the array to send health updates to Nimble Support, this lets them know what Software you are currently running, and if you have any configuration issues that may exist. This is a very nice feature, Nimble support will contact you regarding Software Updates, related to your system, they will know which version you are running and why you should be running the latest version. It gives you the personal touch when it comes to support. Also from this menu you can enable Secure Tunnel, this allows Nimble Support to directly connect to your array. This can be enabled or disabled at any time, you can leave it disabled until you need a support tech to connect.
Software
This is where you can update the software for the Array. It will keep two versions of the software on the Array. When you want to check for a new version click Download, and it will connect to the Nimble Support site, and check for any software updates that are compatible with your Array. If your Array is not connected to the Internet on the management interface, you can go ahead and upload a software file to the array.
Change Password
No need for a picture here, you can change your password.
Default Space Reservations
When you create a new Volume, these are the defaults settings that are displayed.
Date/Timezone
You can set the time, and timezone, you can set this manually or with a NTP.
Inactivity Timeout
The amount of time before you session expires. The default is 30 Minutes.
DNS
Here you setup the DNS servers, you can have a min of 1 and a max of 5
SNMP
Configured your SNMP to communicate with a network management system.
Plugins
This is new to 1.3.3.0 Software. Right now all it includes is the ability to add the Nimble Array to vCenter for management from the DataStore View. If you are running Software below 1.3.3.0 you need to do this with CLI. Later in this posting I will talk more about the vCenter Plugin and the CLI. While on the topic of 1.3.3.0 Software, another great feature that was enabled was the ability for the Array to support more than one drive failure, that is great news! If you are running a Nimble Array, upgrade your software as soon as possible.
Help
We all love to look at the Help Menu, right?
This one is pretty intuitive, and make’s life a little easier.
Nimble Support
Takes you directly to the Nimble Support Site.
About CS-Series Array
Gives you the Normal About Screen
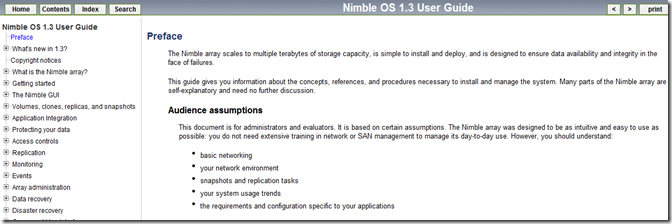
Administrator’s Guide
I like this, no PDF to download, always up to date. Just click the menu item and look for the information you need.
Hardware Guide
Just like the Administrator’s guide, just click and enjoy.
Conclusion
As you can see the Interface is very user friendly, but gives you all the information you need to Configure, Monitor, and troubleshoot your Array. In this post I had planned to talk more about configuring your array, updating the Software, and the CLI. But just the walk through of the UI took longer than expected. I plan in the next couple of weeks to post a few different blogs related to NimbleStorage.


